Showing posts with label shih tzu. Show all posts

Saturday, March 7, 2015

Valentine's Project Life + FREEBIE giveaway

Good Morning!

The snow has been pounding us here in the DMV area. We just received another 8 inches yesterday and I'm so done with it! Well, on with my layouts and then I have a surprise for you!

Featuring Camera Journaling Card Je T'aime Card Love Jar Card Weather Journal Card

Featuring Valentines Day Journaling Cards
And now on to the super fun stuff... the Freebie Giveaway! Just CLICK HERE to download the 300dpi JPEGS to print at home!

These journaling cards are made to coordinate with Music Volume 1 Journaling Cards.
https://www.dropbox.com/sh/8ocg0sna9akwgo6/AAAXlt4W9w3iWaQSoCRshR9Sa?dl=0 

*****DISCLAIMER: I am not affiliated with Project Life or © Becky Higgins, LLC.. I am a customer that uses the system and designer making cards for my use and for sale. Visit BeckyHiggins.com to learn about her program. 

Thursday, February 2, 2012

Family - October Afternoon

Ever since Chloe has come into our lives, our days have been filled with vet visits, 4 walks a day, and being the referee between her and Jada. I wouldn't change a thing. It's been so exciting and fun but I've hardly had any time to actually scrap the pictures I've taken. But this past Tuesday I finally received my new package of goodies  from Two Peas. The Farmhouse collection from October Afternoon is absolutely wonderful in every possible way. It is so versatile and just screams to be used. The papers just flow so well together that it's so easy to mix and match. It can be used to scrap anything that feels old or vintage; however, it can also be something warm and home-y.


October Afternoon - Farmhouse - Button Box, October Afternoon - Farmhouse - Her Bureau, October Afternoon - Farmhouse - Faded Wallpaper, October Afternoon - Farmhouse - Church Social, October Afternoon - Farmhouse - Clothesline, October Afternoon - Farmhouse - Kitchen Cupboard, October Afternoon - Farmhouse - Word Stickers.

The journaling reads "Our happy family of three has now become a family of four. At first the idea of training another puppy worried me. Could I do it again? But now I can't see our family without Chloe." I started out with a couple of simple squares cut out and layered on top of each other. I loved it so much that I left it that way and only added embellishments to it.


I loved the little thread holders that were on one of the pages. I broke out my scissors and cut out one with yellow thread. It already had thread painted on it, but I decided that I wanted to wrap it in real thread for added affect. I placed a dot of glossy accents on the back to be sure that the thread didn't unwind. Then, I dug through my FMIL's stash of antique buttons for the final touch. 


I loved all the stickers that come with the Farmhouse collection. The word lists can all be lined up to add a border or stacked. They are so versatile. I loved this sticker that said My No.1 Key to Happiness. I just felt that it summed up my feelings of this photo. To finish off my page, I broke out the sewing machine and played around with the different settings for different stitches. 

Unfortunately, I only purchased one of each page. I didn't realize just how wonderful this collection is. I wound up using three different papers on this layout alone. I'm already getting my shopping cart ready for a replenishment shipment. These are just too fun. I always seem so surprise when I get anything October Afternoon. I always start out unsure, but once I get them in my hands, I fall in love!

Monday, January 16, 2012

Bedtime Hug - Webster's Pages & Hot off the Press

Chloe has been a part of our family for about three months now but I haven't scrapped a single page of her yet. I've left some of her pictures on my desk hoping to get a little inspiration, but I've been constantly stuck. (I guess all the wedding stuff has become my prime focus.) So, I was looking around the internet and came across two separate sources of inspiration: 1.) Color Combos Galore #215  2.) Lynn Ghahary - Country Boys. I loved the soft colors and feminine texture of the CCG challenge and the soft hearts on Lynn's page. So here's my attempt to merge the two!

Hot Off the Press - Color Me Flowers, Webster's Pages - Lullaby Lane - The Arrival, Ranger - Tim Holtz - Distress Ink - Spun Sugar,  Ranger - Tim Holtz - Distress Ink - Vintage Photo, American Crafts - Thickers - Maple - Black, Fiskars Border Punch - Flowers

The background paper was so much fun to work with because it was an ink resist paper. I started out rubbing it with Spun Sugar but it seemed too pink. So I opened up the ink drawer and looked for a neutral. I finally decided on Vintage Photo to tone it down with. I'm pleasantly surprised with the exact hue I finished with. My only words of wisdom with these kinds of paper is to start out with your lightest ink first. It's easy to add color to darken, but it's a lot harder to lighten once you've made a mistake. Try testing a small corner or an area that you plan on covering up.


I've really been into the texture that border punches give. So I decided to stack a couple of them on top of each other. I liked the look that I got, but they just seemed to blend in together too well. So, on every other edge I rubbed some more Vintage Photo ink. I really gives it a little more depth. Some machine stitching also made an appearance on this layout. It's just such an easy way to make a layout look more finished. I stitched a border around my entire layout as well as around my photo. The stitching also appeared on those sweet little hearts. Speaking of those hearts....

here's those adorable little hearts from Lynn's page. I just loved the sweet feel it brought to the page as well as the texture that it brought from the right to the left. I always try to balance out my page. I had a heavy texture on the right, so I needed texture on the left. I did the same with the title. My little puppies are black and white so it's always hard to work black in somehow. I know that it would probably make more sense to use the brown letters, but they just seemed to fade into the background. By using the black letters, I brought the black from the photo over to the left side of the layout.

I had fun on this layout. It was the first time I've ever used an ink resist paper but I've concurred my fear. I actually want to do more with these diverse products. Hope you'll join me for the next time!

Monday, November 7, 2011

The Pumpkin Thief - American Crafts

Hello everyone! Hope everyone is enjoying their November now. I'm back with the second part of my pumpkin carving. While Morgan and I were carving pumpkins, Jada thought she could sneak away with our scraps. Unfortunately for her, Donna was snapping away at her with the camera. Some really cute pictures surfaced with the evidence (and a lot of tongue showing).


I used the American Crafts Nightfall collection again. I love the use of blue tone in these pages. It's so fun and unexpected. I inked all the edges with Tim Holtz's Broken Twig ink. I think that's one of his best browns. It's got a red undertone so it comes across so warm. I stitched a zig zag stitch around the edges with brown thread. Sewing on your layouts gives it such a beautiful dimension. I'm really glad that I worked up the courage to try it.


I chose one of the pictures as a focal photo because it showed the carved pumpkin as well as Jada sneaking off with some pumpkin in her mouth. I wanted to draw attention to the little bandit, but I didn't want to cover any of the picture, so Chipboard was out. I looked at the outside stitching and thought it would be cute to stitch around her. I brought the star shape out from the background paper and used different shades of brown thread. It's one of my favorite parts of this page now.


The letters where so cool! I loved the thin weight of the letters and how tall they were. They did not want to cooperate, however. Every time I use letter stickers I always turn them sticky side up and arrange them how I want them to go. When I'm pleased with the look, I'll flip them over and secure them down. These, however, did not want to go sticky side up. They wanted to tangle on each other or stick to me. So, for the first time ever, I had no choice but to just stick them down with no rearranging. The journaling was written with an ink pen. I like the juxtaposition of the tall letters with the small cursive journaling.

I hope everyone had enjoyed this layout today. I'm really proud of this one and I can honestly say it's one of my favorites now. I love the Nightfall collection. I've saved enough of it to make a Thanksgiving layout later on. I hope you all enjoy your Monday and make sure to come back and see me. :)

Tuesday, October 18, 2011

Shake It

Hi there everyone! I've been having a blast this fall. I'm sad to say that our fall will end in 2 days. :(  It's about to drop into the 50s here. But, I was lucky enough to hop outside and grab some really cute pictures of Jada before that happens! I had my camera set on "action" mode with continuous shooting selected. All I had to do was hold the button down and it would keep taking pictures. I had to laugh when I saw this succession of shots. Jada decided to shake when I was taking pictures and I caught the step-by-step of it.


 The three pictures were the starting point of my layout. The yellow and green colors of the pictures lined up perfectly with this cute woodland paper from Paper Studio that I've been trying to find a reason to use. I just love the cute Bambi feeling of it.

To continue with the homespun look of the papers, I used brown thread to make a border around my page and highlight fun little areas. I used a fiskar's scalloped border punch on a cute orange paper from Imaginisce to help my photos stand out a little more. The edges were inked with Tim Holtz's distress inks in the new fall collection colors.

I hope you enjoyed my layout! I can't help but smile when I look at it. I also hope that you follow my blog and a big thank you if you already do! See y'all soon. :)

Supplies Used:
Chipboard Letters-The Paper Studio
Inks-Tim Holtz's Distress Ink in fall colors
Papers-The Paper Studio and Imaginisce

Monday, October 3, 2011

Day 3: Branch out of your comfort zone

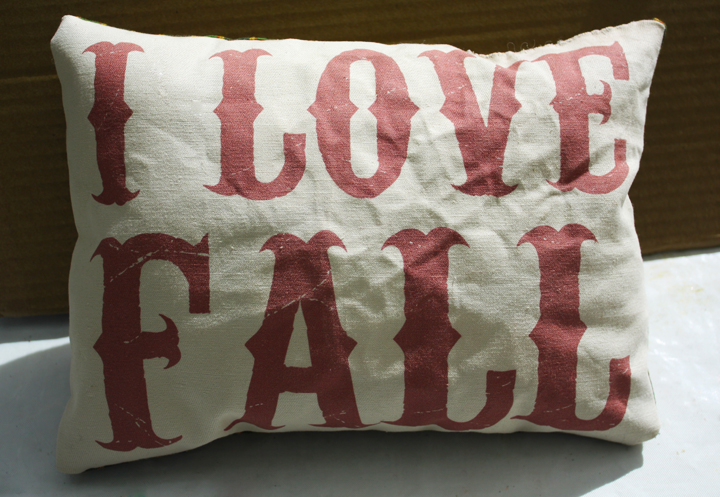
Anyone who knows me will also know that I am NOT a seamstress. lol. With that being said, I challenged myself to make at least one sewn project. It's nothing grand, but it was completely new to me. To start off, I printed my material on my ink jet printer.


To print using your inkjet printer:

  1. Iron your fabric
  2. Spray Adhesive spray evenly on a regular sheet of computer paper (pay close attention to the edges as these will become unglued the fastest.
  3. Attach the paper to the back of your fabric.
  4. Now that the paper and cloth are stuck together, Iron on high heat.
  5. Make sure that you iron on BOTH sides.
  6. Trim the excess from around your paper as close as you can get it.
  7. Run it through your printer like you would print normally.
  8. Peel back off and enjoy!
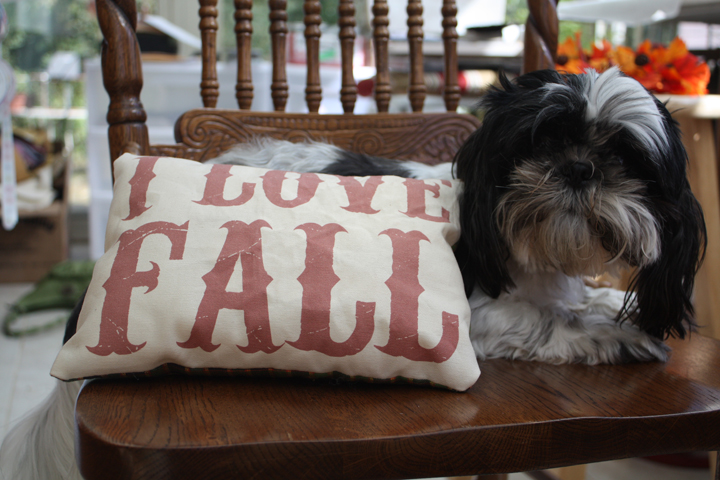
Keep in mind, this technique is not washer safe. The colors will bleed if you put it in the washer so I don't recommend doing this for something like a quilt or clothing. It was perfect for my decorative pillow because I don't plan on washing it.

I ran my pillow through the sewing machine inside out leaving a hole at the top. I then used the hole to turn the pillow right side out and stuff it. Then I hand sewed the hole up. It's far from perfect, but I'm very proud of myself. This is my first ever pillow! Jada did not seem to pleased at becoming my model though. :)


I hope you all enjoyed today's post. Your challenge today is to do something that you're uncomfortable with. It will open your horizons a little more. (If not, it will at least turn into a very funny conversation for later.)  I appreciate each and every person who has joined in and want to say thank you again. Have fun and don't forget to become a follower!

Tuesday, September 6, 2011

Beautiful Brave Girl

Hope everyone had a safe and happy Labor Day. We were very lucky to have Caleb home for a few days but all good things come to an end. He just made it back to Ohio yesterday evening. Well, on to the project for today.

I have quite a few favorites when it comes to scrapbooking. I like Jennifer Perkins, Lady Grace Belarmino, Rebecca Trump, and Lisa Truesdell. This week, my first project was inspired by Lisa. (You can view her online gallery HERE). On a lot of her layouts, she uses scrap pieces of paper to create a border around her page. I love the look it gives. It's a little messy but so streamlined at the same time. I thought I would try it out myself on a page about Jada's spay. I've known a lot of friends with dogs that had been fixed. They all told me that it was no big deal and Jada would be just fine in a day or two. So I took her to the vet with a very naive mentality. I thought she'd be back to her old self the next day, but that wasn't the case. The spay was really hard on Jada. She would wince any time she moved and she refused to drink any water. It took 7 days for her to get back to normal.


I've had these papers from the Paper Studio for quite some time. I had originally bought them to do a layout on my grandmother because her favorite color was pink. The background page is My Mind's Eye's Lost and Found collection. I liked it because it's a subtle pattern that gives a little warmth without being distracting.


The embellishment from 'GCD studios - Melody Ross' was really what gave me the inspiration to dig out those papers. It had the same creamy brown and pink on it. I originally thought about bringing in some more of the deep pink color, but I liked that little punch in the center so I stuck with the light pink instead.


I took one of the coordinating papers and cut out some shapes to fit behind Tim Holtz's Fragments. I inked the edges with Tim Holtz's distress ink in 'Worn Lipstick' and attached them to the back of the Fragments with Glossy Accents. Word to the wise: Make sure you don't have any glossy accents on your finger when you press it down or it will smudge the front.


I used one of Tim Holtz's Adage tickets as well as a lot of lace and trim from my FMIL stash. I have no clue where she gets it all, but somehow she manages to have the best of everything. She's the yard sale queen! LOL. Hope you all enjoyed this layout.

Wednesday, July 20, 2011

Waiting


My wonderful FMIL took an adorable picture of Jada. (I swear, that dog has more pictures than a Hollywood celebrity!) The picture shows Jada peering out the window waiting for us. Anyone who knows Jada also knows that this is an everyday occurrence for her. She's always waiting for us and she becomes so happy and excited when we come home. You can have the worst day in the world, but when you come home you can't help but smile as she stands on her hind legs waiting on you to pick her up and love her. That's why I thought the title 'Waiting' was so appropriate.

But even though I had found a title, I had no clue where to begin. I didn't want to put it on a white cardstock background because it would lose some of its warmth. I had tried cream cardstock, but it still didn't seem right. Then, my FMIL and I visited our LSS and I ran across and adorable paper! It's Kaiser Craft's Homemade Collection- P569 Friendly Family. It has a beautiful retro design on the font and a soft textured back. I got two pages of it so I cold use one side as a background and the other side as an accent page.


I've been seeing so many of the cute little kite banners, but I've never had the guts to do one. Well, here's my attempt. Did I succeed? LOL. I used Viva Decor's Perfect Pearl Pens to connect the edges of my banner in the top right corner. The home sweet home paper is actually the info at the bottom of the paper. It's the piece that has the manufacture info that you usually cut off. (They are making those so cute that you never throw them away!)


The journaling says "Nothing washes your troubles away like seeing the unconditional love of a dog waiting for you". I lined all of my journaling and papers with Paper Studio's cardstock to help it stand out. And the finishing touch was American Crafts Thickers. I love the Marquise chipboard letters because they look like they have stitching on them which added to my "Homemade" look. I just love the little details that go into everything.

I hope you enjoyed this layout and please show your love for my blog by following it and leaving comments. I can't wait to hear from you!

Wednesday, June 15, 2011

Bubbly

Ah, bubbly summer layouts! They just make me so happy. These pictures where so bright and colorful, so I wanted to find a paper that went with that feeling. I found this adorable double-sided polka-dotted paper in my scrap stash. (It had no markings on it, so I have no idea who makes it.) The green pattern on the individual circles is the backside. 

I originally had everything on a yellow patterned background. But when I started laying out all the papers and the pictures, it all looked so overwhelming. I replaced the yellow background with a white one and this seemed to let the patterns really pop. However, a new problem arose. All the papers seemed to disappear. So, I put a black edge around all of it. It really gave the colors a great base. 


Sunday, May 29, 2011

Head in the Clouds

Well, I'm just now starting to upload my newest pages. Been a little crazy. I've moved, so now I'm closer to my wonderful family. Got an adorable photo for y'all.


Yep, that's Jada. She's upside down with a duck on her face. Need I say more?


When I saw the "Head in the Clouds" paper by My Minds Eye, LLC. I had to get it. It just seems like the perfect match for this photo. Jada is obviously floating around in the clouds. I stuck with the color palette of yellow, red orange, and baby blue. I'm very proud of it!


I've been seeing some cute pinwheels on some pages. I decided that this was the layout to do it on. The brads had to be painted white to match the layout because I only have black ones right now.


Hope you all liked it. Hopefully I will have more up soon!

Sunday, March 20, 2011

Toilet Paper Roll Mini Album

Yep, you heard me correctly. I've made 4 toilet paper rolls into a mini album. Make sure to let everyone in your family know that you want to save the cardboard tube that is left over after all the paper is gone. I was lucky because we have a small trash can in the bathroom that only holds the tubes. We never actually throw anything else in there.

Start out with a 4 regular tubes and flatten them down. If you need to make the edges a little crisper, try running a ruler down the edges while applying pressure.


You should end up with something that looks like this. Each page will be 2 5/8 x 4. If you want to punch a circle in the edge to act as gripper tabs, then now is the time to do it. After you cover it with paper, it will be too big to fit in an average punch. (I had to find out the hard way, so mine doesn't have tabs).

Next, cover each tube with your choice of papers. Double sided paper makes things easier because you have so many different sides to choose from. I used 4 different double sided pages that I had just scraps of. I like to leave a little bit of the edges showing so I cut my paper 2 1/2 by 4 inches. I used wonder tape on all the edges. I usually use stick glue on my projects, but the rolls still want to curl a little. So, I used the heavy duty stuff to make sure that it would be a secure fit. Make sure that you don't glue the tubes closed. You want to leave them open so they make a pocket for your journaling cards. I then used my Binderie to make to holes and secured with small black binding rings (both products are from 7Gypsies). At this point, my album looks like this:


 Also, cut 4 extra pieces of your double sided paper to use as cards. I trimmed off half and inch and cut three holes on the outer edge of each card. Then I put the furry fibers in each hole. (After using the fur fibers, my desk looked like a lion exploded on it. It gets very messy.)


Now your album is complete and ready to be embellished. I'm planning on going to the park today with my puppy Jada and using those photos to go in here. Jada needs a little treat. She got shaved today and she was actually very calm throughout the process. Here she is... mid-shave.


I hope you enjoyed this mini album. It's so much fun to make (and funny to see people's faces when you tell them it was a toilet paper roll). Thanks for viewing!

Wednesday, March 16, 2011

Little Frog


YAY! This is my first ever post. Well, lets see here... something witty to say.... umm, hi. :)

I thought I'd just get the ball started with a recent layout I did for a 4x6 photo challenge on twopeasinabucket.com. (I'll provide the link to the original challenge at the bottom). I decided to scrap the two pictures that I had of my adorable shih-tzu, Jada. She runs as fast as she can when she plays, but then she finds herself very tired and hot. So she finds a nice cold place on the floor and *plop*... down she goes. She lays with her legs splayed out so her tummy can rest on the floor. Everyone who has seen her do this thinks she looks like a frog. So I decided to make a page around that topic.

I wanted to use some of my old papers instead of rushing out and buying new stuff (which is soooo tempting). So I rummaged around and came across some old Martha Stewart papers. They were pastel colors that were originally intended for baby layouts. Obviously, I don't scrap baby photos so I had long ago labeled them 'Useless'. But with the frog theme in mind, the light sage green papers seemed to jump out at me.

I began by piecing together a little frog. Not the best looking little fellow, but I wasn't too concerned about making him perfect. I added some brown ink around the edges so he wouldn't just blend in together. The brown actually allowed me to bring in some accent papers and ribbon. I had been wanting to use this cute polka dotted ribbon since I bought it a year ago.


With all my papers and ribbons set, there was only the title and journaling left. I used some brown chipboard letters from the Paper Studio. I think I've used those letters on every single layout I've done recently. They're so pretty and easy to use. But with all those layouts, I've managed to use almost every letter. I had no more T's or i's. So, I improvised. I made two t's with leftover F's by cutting the tops off. The i came from an unused j that had the bottom chopped off.

 After that, I finished up with my journaling on white cardstock, backed with brown cardstock. And ta-da! All done. Though, I have to admit... my scanner gave my page a very strange hue. I'll have to see if I can get a better image later.

Thanks for viewing!

Original Challenge: http://www.twopeasinabucket.com/classes_and_events/classes/22-4x6-photo-love-with-shimelle-laine/lesson/1710824-4x6-photo-love-february-2011/